Location
The 'Location' layer is the second layer in the admin environment.
In this layer you'll roll out applications (first layer) to a specific location.
Within this layer you can also customise content for the specific location.
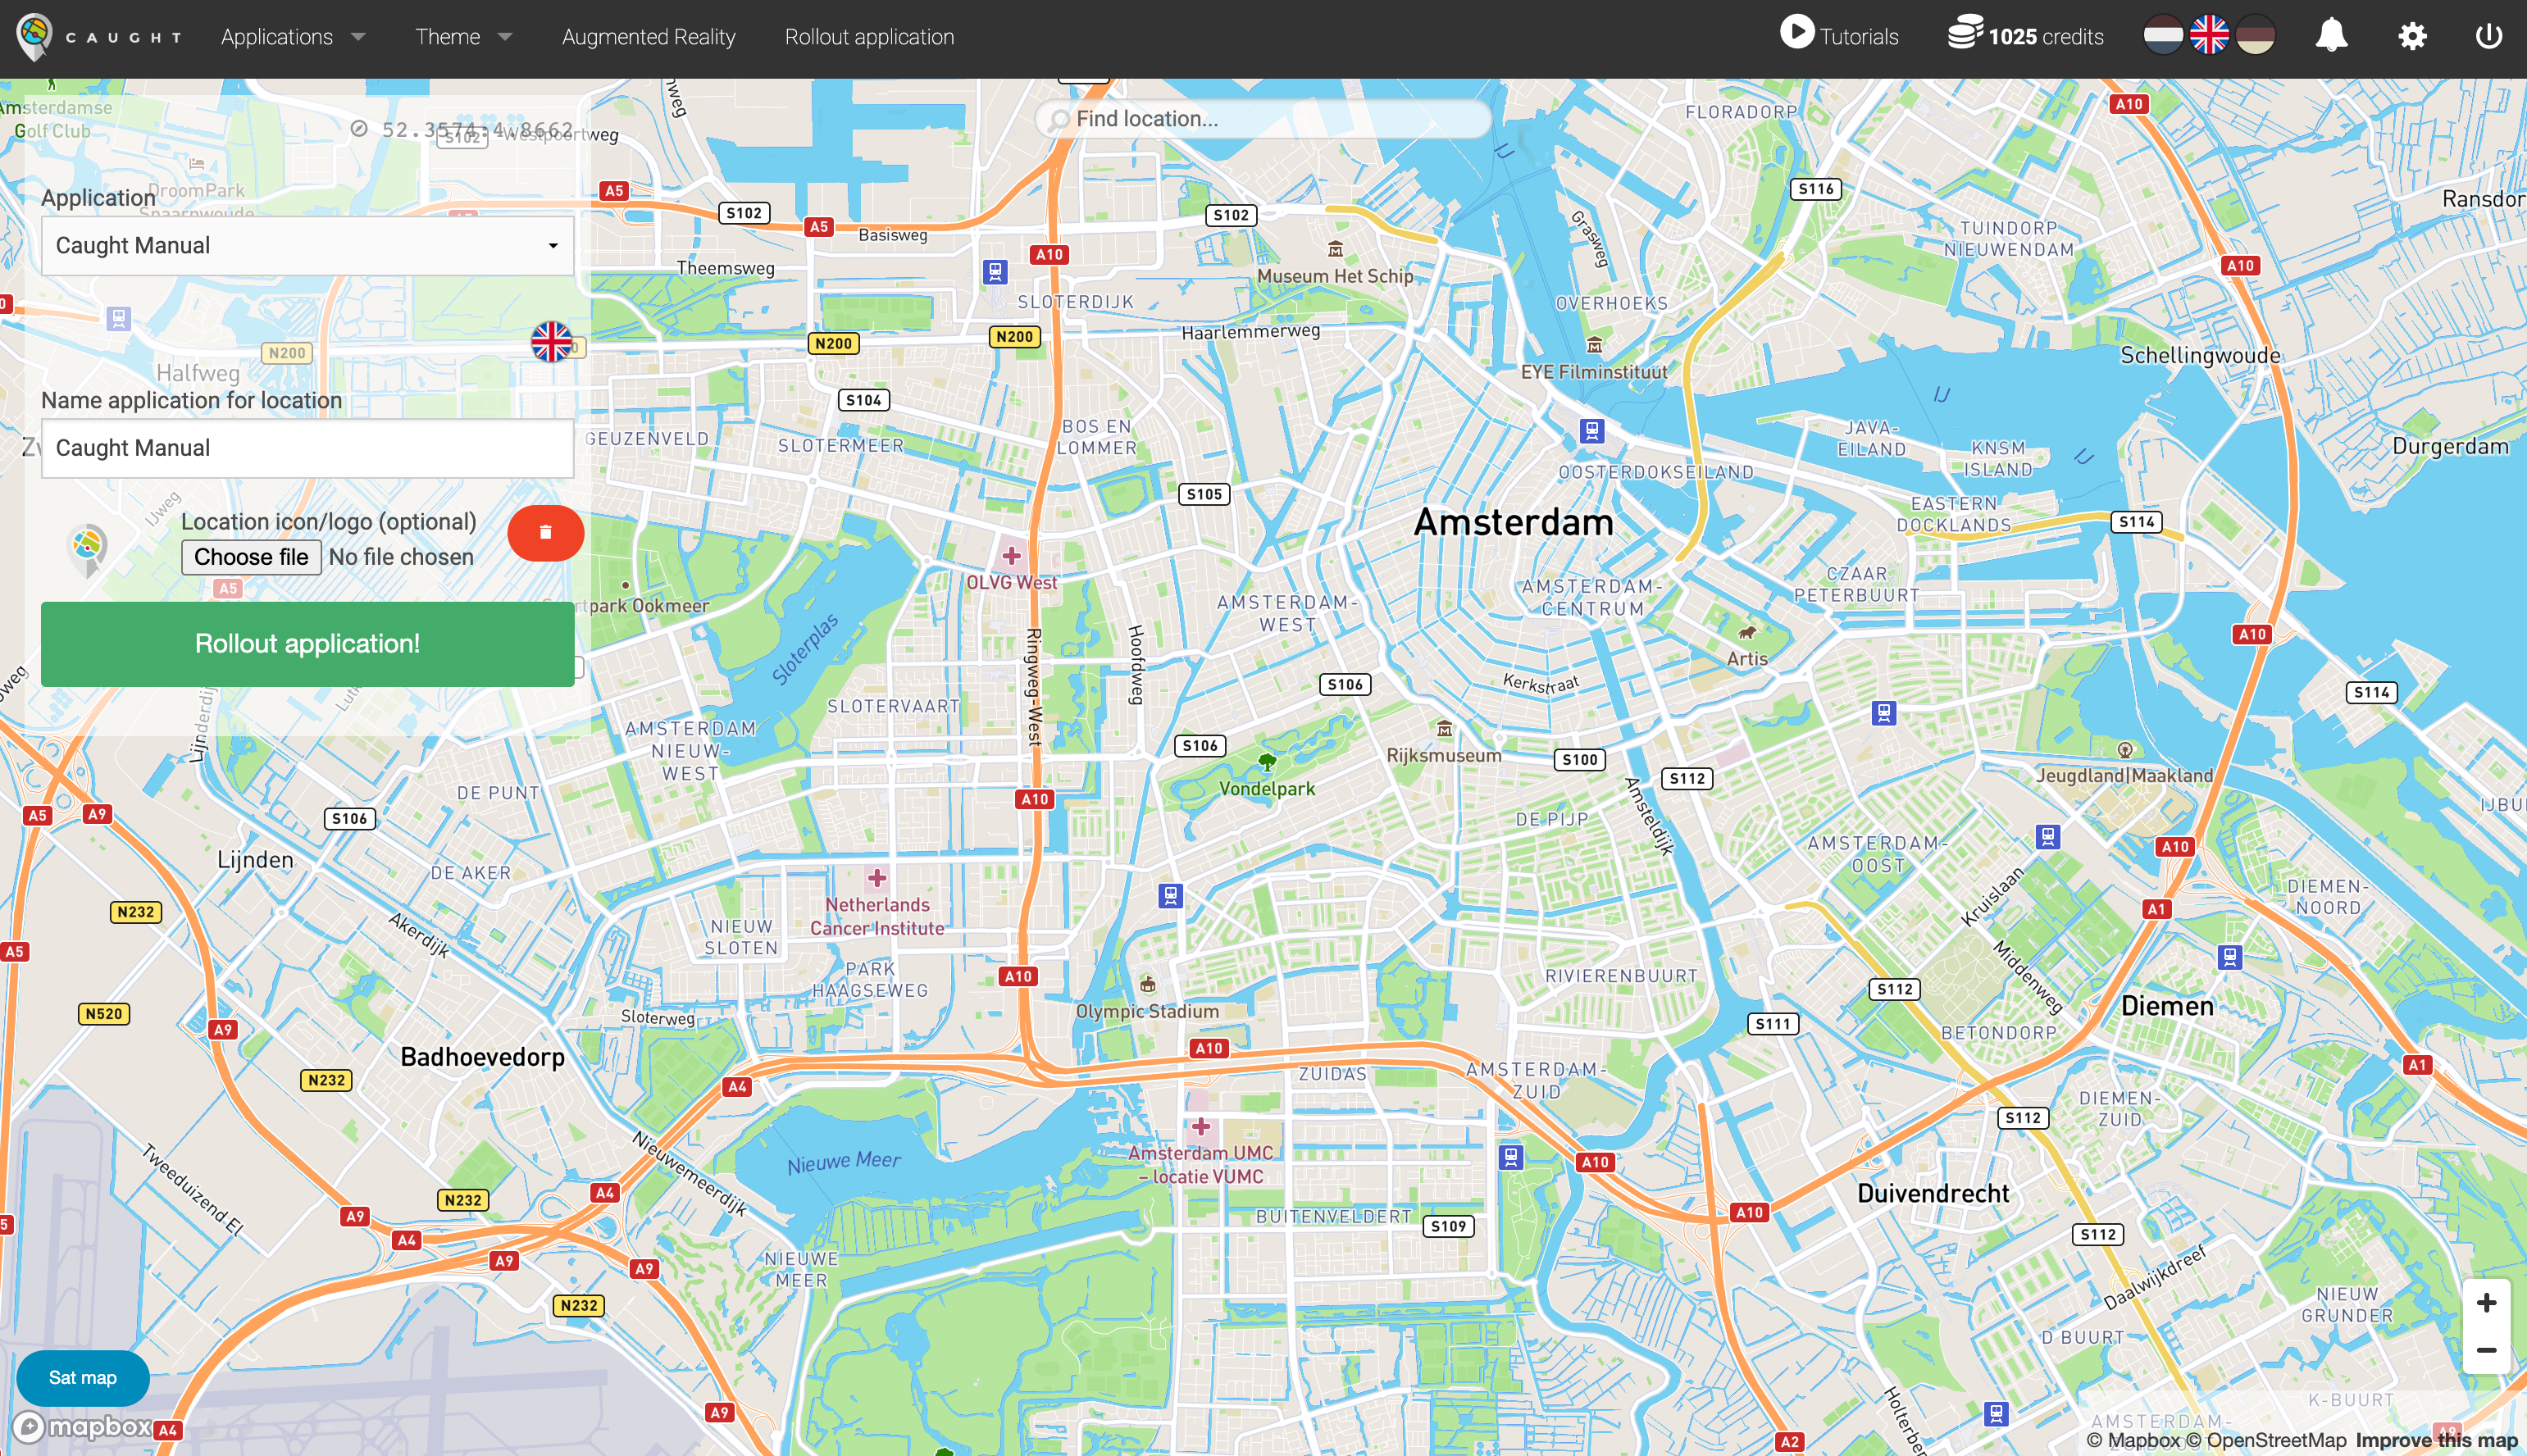
In the top menu click on 'Roll out application' to start rolling out an application on the map.

Details;
When rolling out an application you'll need to enter the following details:
- "Application"; select the to roll out application.
- "Name application for location"; the name of the application for this specific location.
- The name of the application can be different for every location.
- "Location icon/logo"; select an icon/logo for this specific location.
- The icon/logo of the application can be different for every location.
Select a spot on the map, using the cursor or the search bar, where the application will be rolled out.
The selected spot will be the centre of your location specific application.
The selected location will also be the spot on the map where the app first opens for users.
(the first part of the map they will see after logging in and before their own actual location is determined)
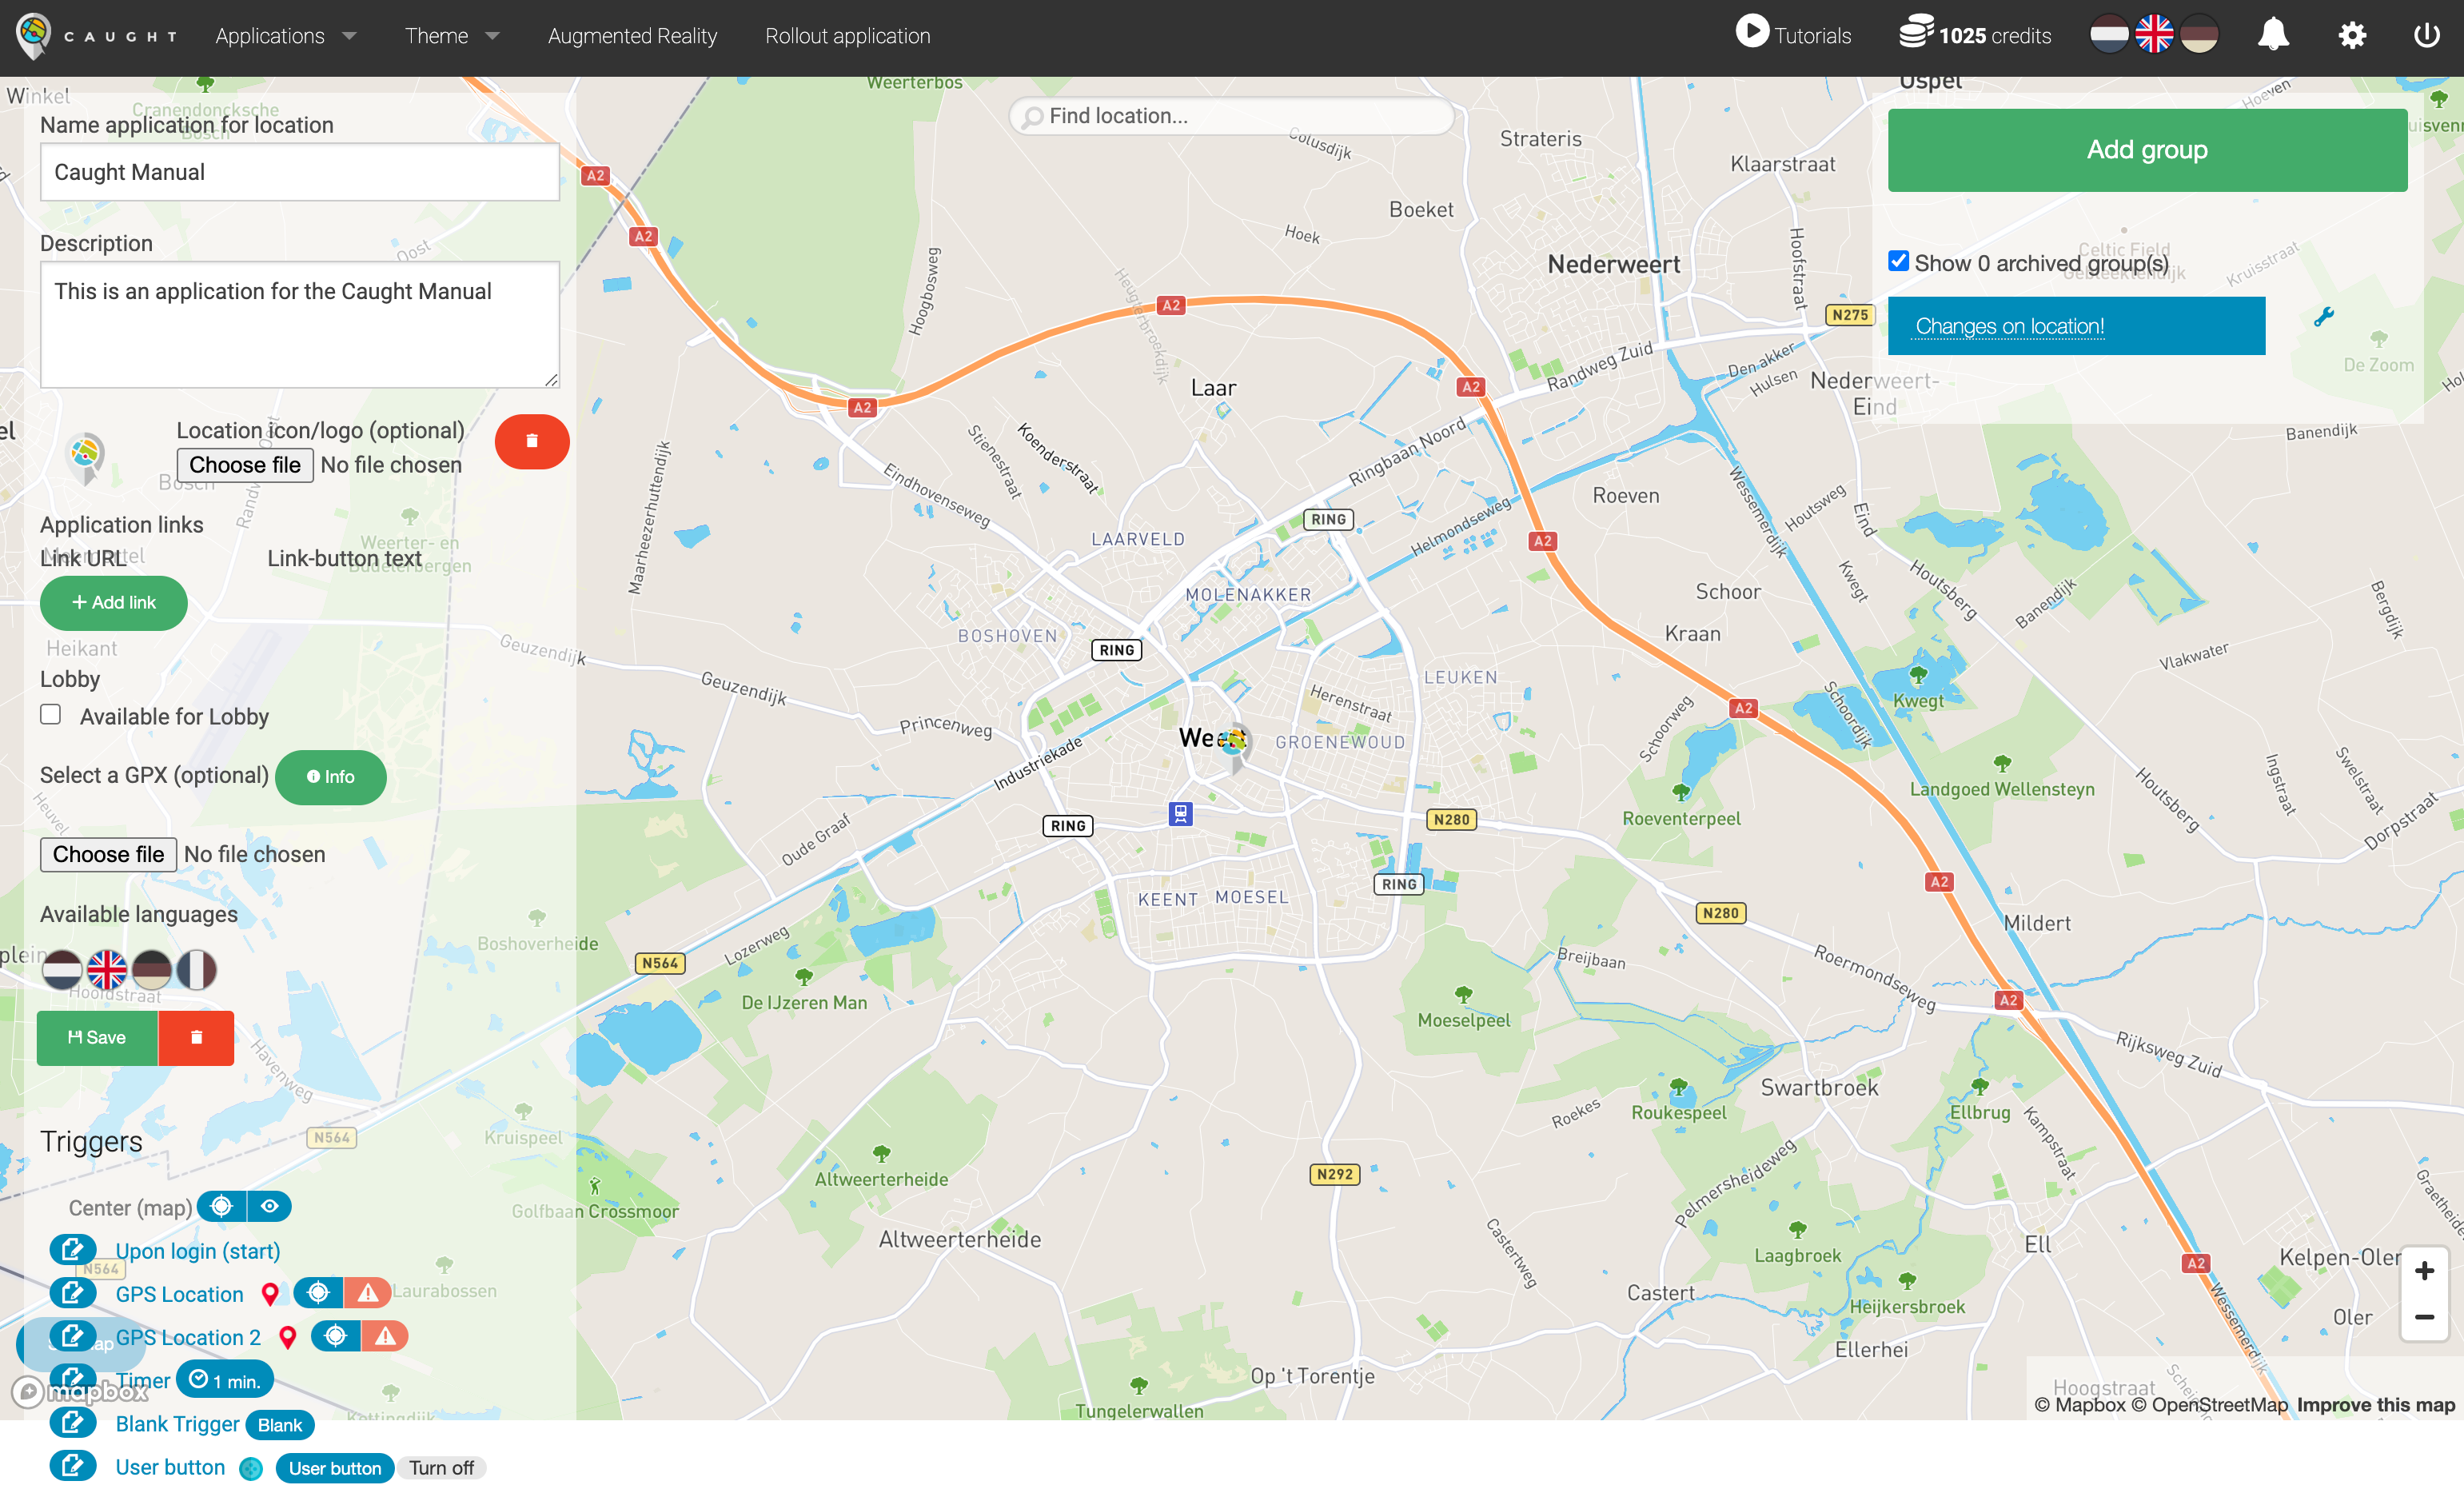
Then click "Rollout application". Now the application will be rolled out and the screen below will appear.

Details;
When rolling out an application you'll need to enter the following details:
-
"Name application for location"; the name of the application for this specific location.
- The name of the application can be different for every location.
-
"Description"; a general description of the app.
- This description will be visible for the users but can later be customized/personalized in the "Group" layer.
-
"Location icon/logo"; upload an icon/logo for this specific location.
- The icon/logo of the application can be different for every location.
-
"Application Links"; add a link URL.
Press '+ Add link';
-
"Link URL"; a link URL.
-
"Link-button text"; the title of the link button.
-
In the settings within the app, there will be a button with the link URL for the users to click on.
- "Lobby"; if checked - the rolled out application will be available for Lobby.
- "Select a GPX"; upload a GPX file (optional)
- "Available Languages"; choose the desired languages.
- The app will be made available in these languages. An additional language can be added later at any point.
- "Billing tag"; select the desired option (if applicable).
Triggers
Click on the 'crosshair' symbol behind "Center (map)" to move the center of the game to a selected location on the map.  This ensures that the map the host and players is centered at this location when the app is opened.
A trigger or GPS location can be placed on the map by selecting a spot on the map (placing the "crosshair"), using the cursor or the search bar on the top (address/coordinates), and then selecting the 'crosshair' icon behind the trigger or GPS location in the trigger list on the left. 
If a trigger was already placed this button will re-place it to the currently selected location.
Triggers with a red exclamation mark at the end have not been placed yet.

Click on the icon of a placed GPS location trigger on the map to control the radius of the area that people need to be in to trigger the GPS location when using.
(The displayed value represents the radius of the circle in meters)
\
Click the 'eye' icon to see where a trigger has been placed on the map. 
Click the 'bin' icon to remove the trigger from the map.
Click the 'edit' icon in front of the trigger to edit the content of the actions under this trigger for the current location (or the currently selected group).
