Admin
The admin environment is the most complex part of the platform. It consists of a theme editor and the following 3 "layers":
- Application
- A completely new type of Location Based App is created under 'Application'. This is the highest level and it is the so called 'App Logic'. Nothing you do in this layer is bound to a specific place and time yet.
- Location
- The application you've created can be rolled out as often as desired on different 'Locations', anywhere in the world. A rolled out version of an application we call a location.
- Group
- Usage of an app always takes place in the 3rd layer, 'Group'. In this layer you create a username and password to use the app you've rolled out at a certain location.
- You can customize and personalize the content of a location to match the needs of a specific group.
These 3 layers operate independently of each other. Which means that changes to one layer will never impact the other layers. A change to the application will not be automatically pushed to all locations making use of it. Also personalizations made on the group, do not change the location the group was based on in the first place.
Theme
By creating a theme, the look and feel can be customized per application. By doing this the application gets its own style.
Changes to an existing theme will be applied immediately to all applications, locations and groups that use this theme.
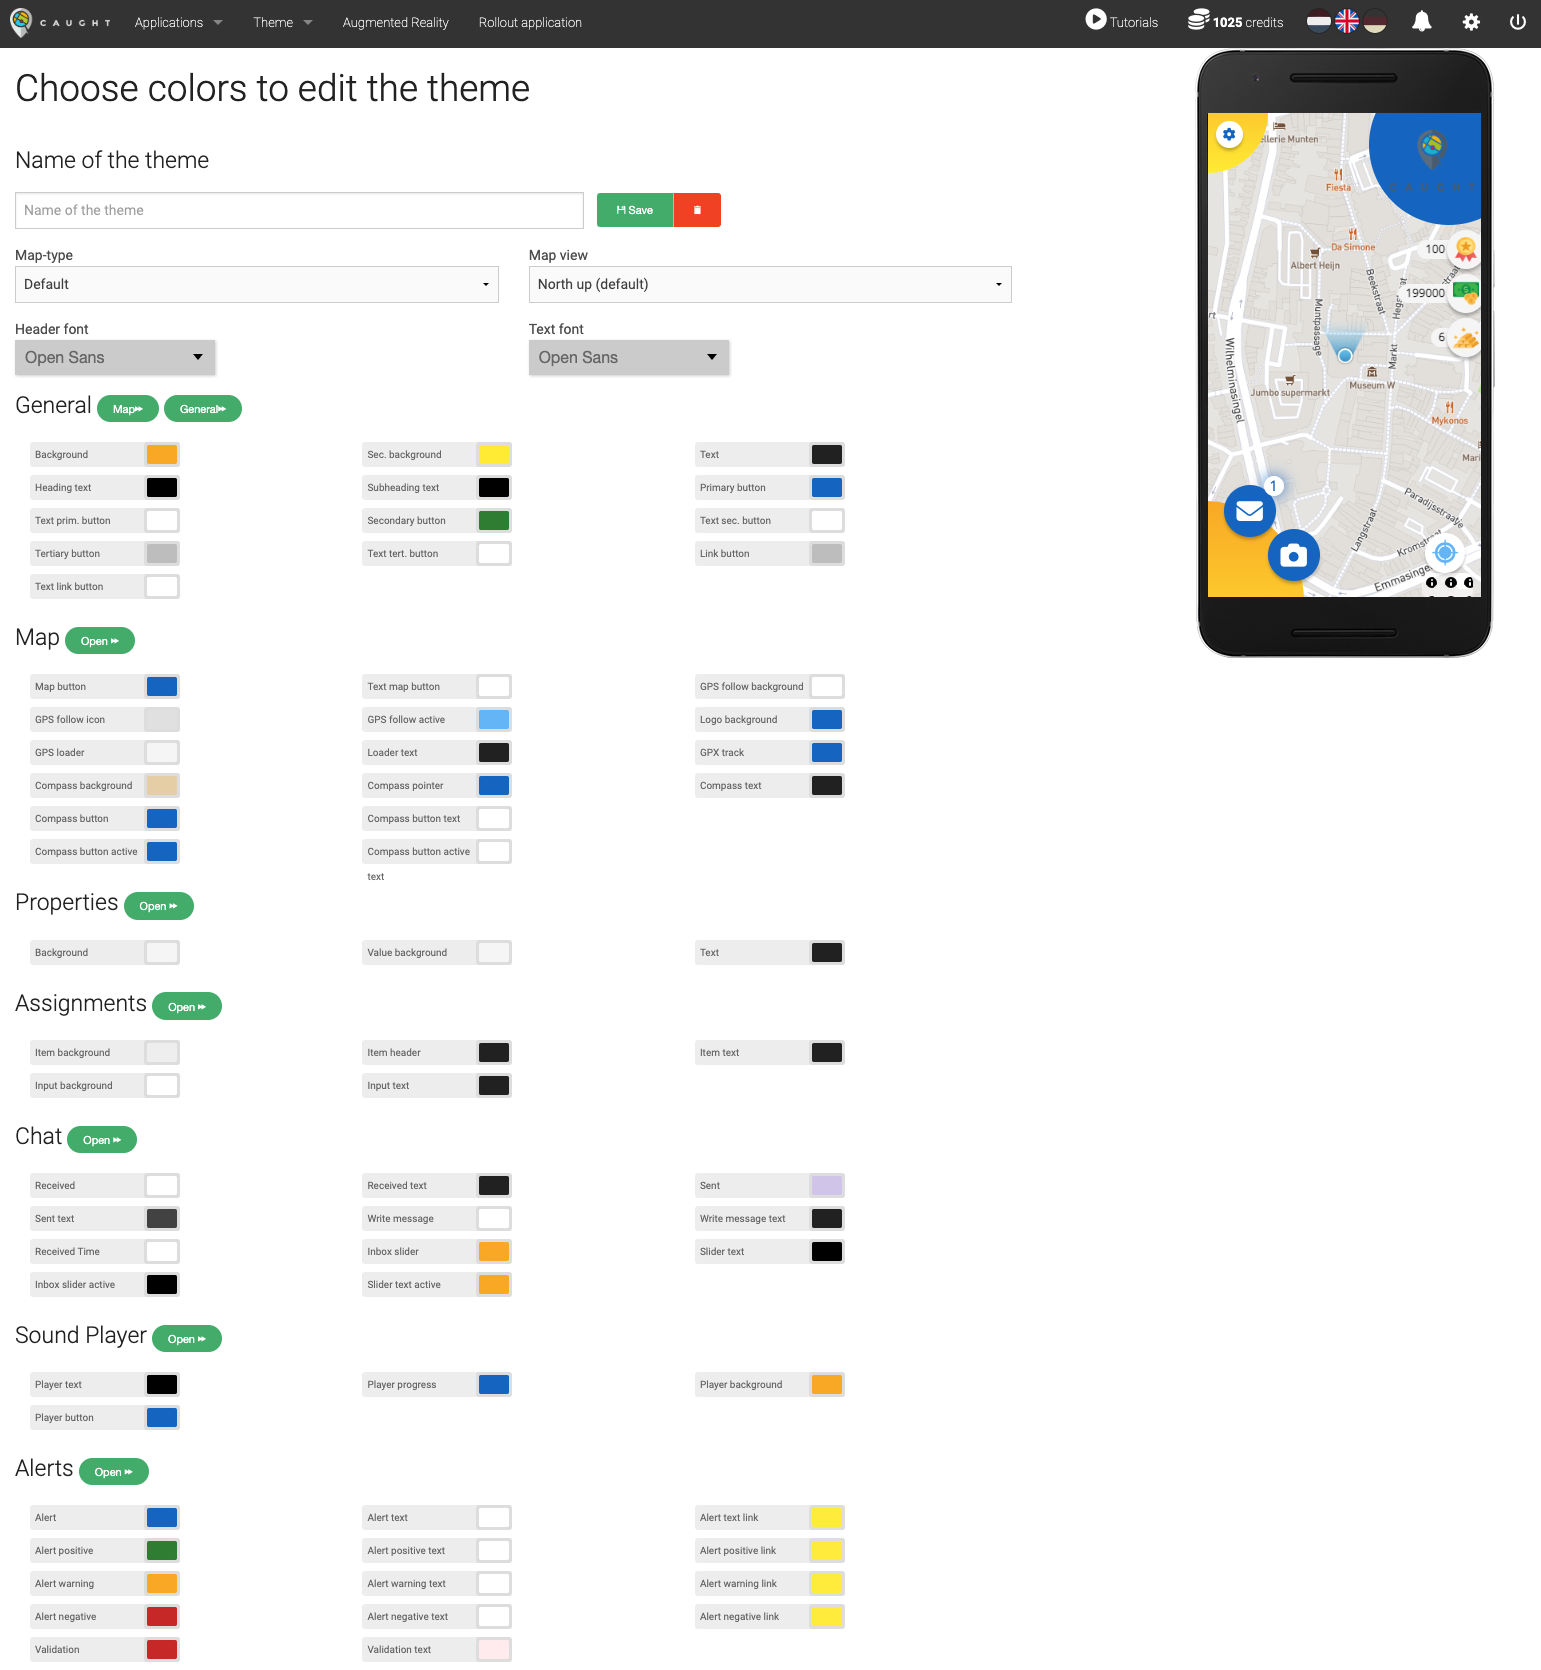
In the menu click on 'Themes' and then on 'Create theme' or open an existing theme to start editing. You will see a screen similar to the image below.

Details:
When creating a new theme you'll need to enter the following details:
- "Name"; the name of the theme.
- "Map-type"; the type of map style.
- "Default"
- "Satellite"
- "Outdoor"
- "Light"
- "Dark"
- "Map view"; the type of map view.
- "North up (default)"
- "Map rotates with viewing direction (compass)"
- "Header font"; select the desired font for the headers in the theme.
- "Text font"; select the desired font for the text in the theme.
Changes will be immediately visible in the phone on the right.
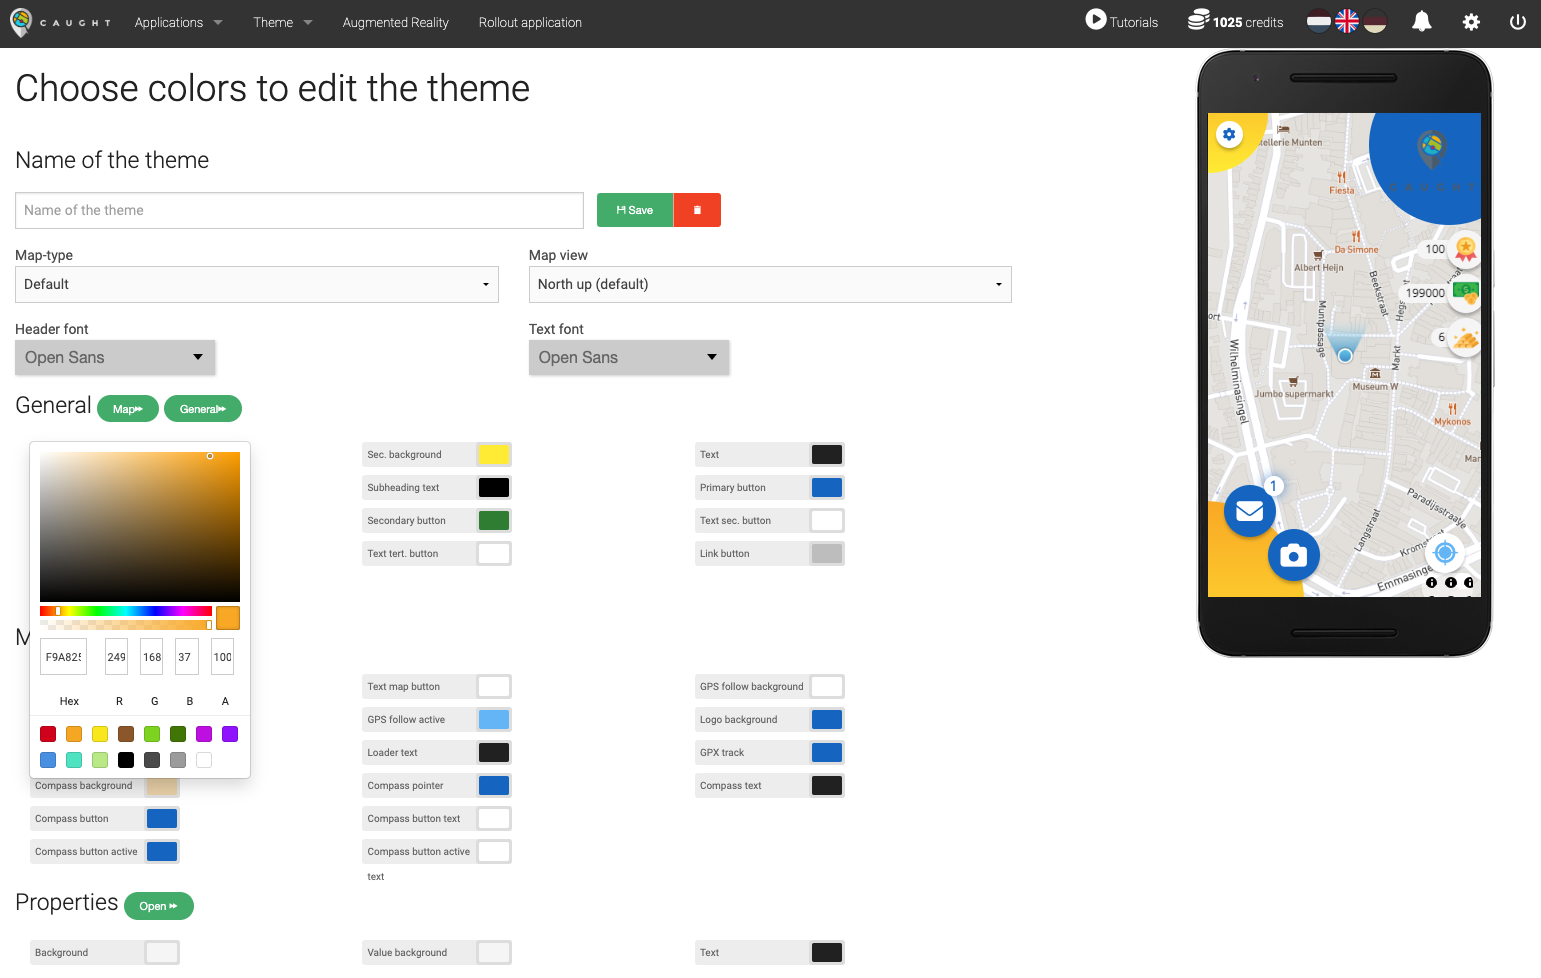
By clicking on the color buttons behind the different aspects, you will see a color palette like below. Change the values or click on a preset color to directly apply it. The changes will immediately be visible in the phone on the right.
Use the 'Open' buttons next to the headers to view the different screens of the application.

After making changes to the theme – always use 'Save' to confirm your changes and apply them.
Augmented Reality
Under the 'Augmented Reality' caption you can create Augmented Reality Trackers.

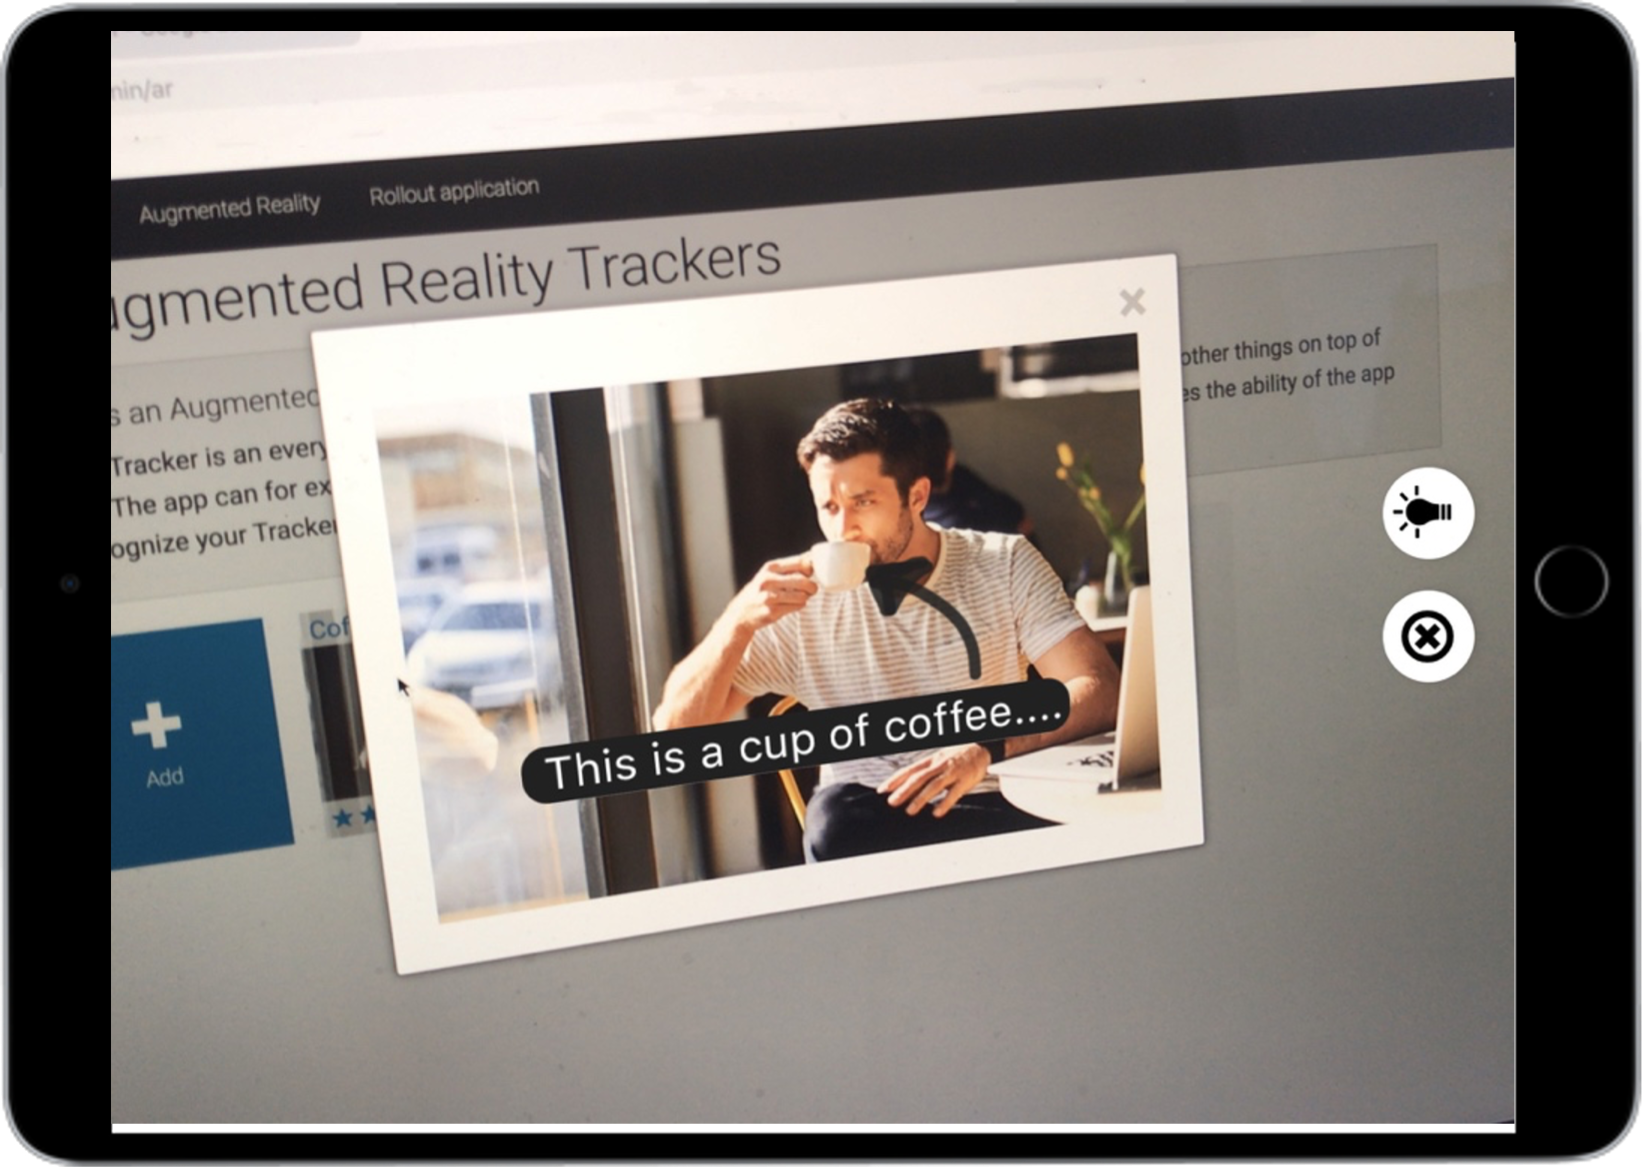
Augmented Reality Trackers are images that can be recognized by the app to "augment" some form of overlay on top of it. This is done using camera view in the app. This way you see the real world through the camera of the app and it looks like the overlay is shown on top of the Tracker. This is called "Augmentation". Hence the term Augmented Reality.
Here's an example:


Trackers are added under the caption 'Augmented Reality' in the admin environment by clicking on the '+' (Add) tile. The following screen will pop up:

It is recommended to read the following document to learn more about how to prepare your Trackers so they can be best recognized by the app:
Must read: AR Tracker Image Tips & Tricks Document
The ★-rating indicates the ability of the app to recognize your Tracker in different conditions.
- ☆☆☆ ; it is recommended to not use this Tracker image. Read the above mentioned document to see what is required for a good Tracker image.
- ★☆☆ ; the Tracker can probably be recognized alright in good light conditions.
- ★★☆ / ★★★ ; the Tracker can most likely be recognized well across different (light) conditions.
Overlays are added to Actions in your created Application. This means the same tracker can be used multiple times to present different overlays over the same Tracker image.
For more information on how to add an AR Overlay to an Action have a look at the section Media in Actions.